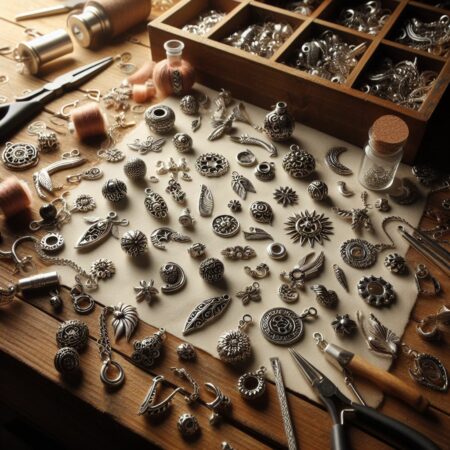
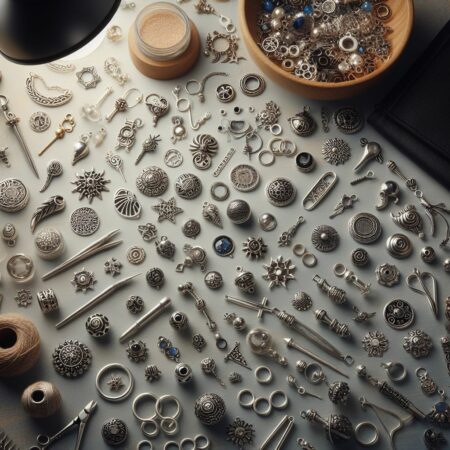
Designing and making jewelry like DIY bracelets with string that people can’t resist requires a lot of creativity and effort. Crafters spend lots of time planning the most attention-grabbing designs they can think of to entice customers to buy. Designers and craftspeople put a lot of thought into their work. Making DIY bracelets with string is no different; the DIY component doesn’t detract from the value of a well-formed piece of craft or jewelry. You’ll need high-quality jewelry-making supplies, like sterling silver beads and gold-filled beads.
Beaders typically spend a lot of time selecting high-quality components for well-thought-out plans, allowing them to produce consistently impressive results.
Craftspeople experience elation whenever they complete a work of exceptional beauty. However, to make jewelry that people can’t resist, you’ll need plenty of imagination, persistence, and patience.
Even the most skilled designers and craftspeople have an off day. However, they are determined to meet the needs of modern consumers, so they keep working hard to improve their quality of work. The onus is now on the consumers to select jewelry that complements their styles and budgets.
Designers and manufacturers of irresistible jewelry take into account many factors, including those held by their customers. They consider the purchaser’s individual fashion statement and cater to a wide range of preferences and budgets. Careful consideration is given to both to ensure that the jewelry complements the wearer’s complexion and features.
From DIY Bracelets with String to Fine Jewelry: A Brief History
Choosing the right jewelry is like picking the perfect outfit for a special event. First, the stature and skeletal makeup are considered. For a long time, beads were simply an ornamental addition to a person’s attire. However, in ancient times, beads often served as status symbols, religious emblems, and indicators of social standing. As a result, Bead jewelry has been around since before the time of the Neanderthals. Both men and women have been found to have decorated their bodies with bits of stones, leaves, rocks, twigs, and even flowers.
Using glass beads for crafting came much later. Approximately 2300-2180 B.C., some antique beads were created. Mesopotamia and the Caucasus region, now part of Russia, were the sites of significant archaeological digs. It was discovered that there was a vast trove of glass beads, each carefully crafted using a different technique.
Beadwork emerged in Egypt, where locals have long been known to sport a rainbow of colorful strands. They also incorporate it into the style of their shoes and garments beyond just jewelry. Even though the most expensive stones and beads were only made as jewelry for the royal family and the wealthy, most extravagant beadworks were only worn at funerals.
Glass beads became widely used during the Seventh and Eighth Dynasties. In 1400 B.C., Egyptians began producing beads for sale in broad markets. The New Kingdom of the Eighteenth Dynasty was the earliest known period of widespread glass production. The glass beads have replaced the precious and semiprecious stones. During this time, a wide variety of styles, colors, and shapes became commonplace.
Do you prefer traditional necklaces and bracelets or the latest in trendy bead jewelry? Can it be plain, or can it be bright? Do you prefer the classic or the daring?
Regardless of your background or lifestyle, the following advice on decorating with jewelry and beads will help you look and feel your best no matter the occasion. Beads and jewelry should go with your outfit, not compete with it. It should accentuate your outfit’s splendor, features, and jewelry. Therefore, knowing where, when, and how to wear your jewelry is essential, whether it’s the traditional gold and silver pieces or the “in fashion” beadworks of today.
Most women who wear jewelry don’t know this, so their friends and family often criticize their style as boring or excessive. This is because they assumed that it would be sufficient to wear it merely or that wearing it simultaneously would be fantastic.
When embellishing with jewelry and beads, there are many factors to consider in terms of cost, physical characteristics, skin tone, and, most importantly, the event itself. As someone who enjoys accessorizing jewelry, I can tell you that the best results come when the pieces are in the right proportions for your body and highlight your best features, like your eyes and hair.
Make a Beaded Bracelet Today!
Do you want to do something that will help you unwind while also being enjoyable and stimulating? Then, why not give beadwork a shot and make a bracelet? When it comes to bracelets, the options are virtually limitless. Fashionable options include wire bracelets, multi-strand bracelets, and stretchy beaded bracelets.
To prevent the bracelet from becoming too loose as you wear it, pre-stretching the elastic cord is necessary for creating a beaded stretch bracelet.
To imitate store-bought bracelets, “tie off” with a clasp made from crimp beads.
You can craft a multi-stranded bracelet by stringing several strands of beads onto jump rings with the help of bead tips.
Cut the elastic to the correct length by measuring your wrist. The recommended number of times to wrap an elastic band around the wrist is 1.5. Next, measure 2 inches (5.1 cm) from your wrist and snip the elastic with scissors. You’ll need this spare piece of string to complete the knot.
It would help if you wrapped the elastic around your wrist where you intend to wear the bracelet. Put in more slack if you prefer a more relaxed fit. Then, tighten by drawing the elastic close to your skin.
Let the elastic out. Stretch your elastic before making your bracelet, so it doesn’t overstretch and break. Keep the elastic in your fingers and pull it gently to tighten it.
If the stretchy cord breaks, you can still do the exercise. Just get out your measuring tape and cut another one.
The tape should be folded and placed over the elastic at one end. Although this isn’t required, it can help novice beaders keep their beads from sliding off the cord. Just fold over the elastic and tape the end.
You can use the tape to act as a cushion for the beads. When you start threading, they will not move along the cord but, instead, stop.
Beads can be threaded onto the elastic until the desired length is achieved. You can now begin stringing beads onto the bare end of the cord. Make sure the strand of beads is long enough to wrap around your wrist before stopping.
You could try planning out your bead pattern in advance. This is an excellent option if you want a specific bead to serve as the focal point of the design.
Wrap the cord around your wrist; if there isn’t enough slack to tie it off, you know you haven’t got enough beads for your DIY bracelets with string.
To keep your bracelet in place, tie a square knot. First, make a knot by crossing one end of the elastic over and under the other. Then, make a second knot by crossing the strand you brought under over the one you tied. After tying a square knot in the elastic, pull the ends of the cord until they are snug.
A drop of super glue can be applied to make the knot even more secure.