Xinar has been supporting DIY crafters with their jewelry design for over twenty years. So we’ve been around, and we know exactly how you can design your own jewelry to sell this year.
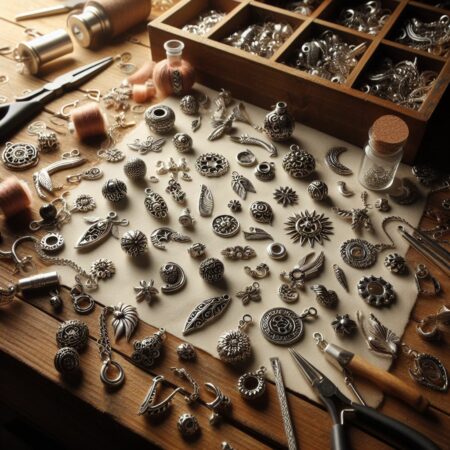
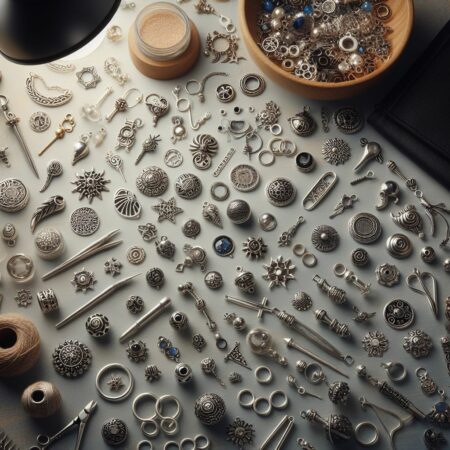
Xinar has a collection of jewelry accessories and beautiful beads and findings in semi-precious metals that can serve as the foundation of your masterpieces. So if you’re thinking of starting a small jewelry business, you’re in the right place!
With the pandemic rocking economies since 2020, it makes sense that many people are thinking – can you design your jewelry to sell? Do you have to be a super crafty expert to do it? No. Do you have to have years of experience? Again, no.
All you need is a bit of jewelry-making know-how, an idea of the history of jewelry, some basic skills like measuring beads accurately, a lot of patience, and a love for all things beautiful, to finally start creating DIY jewelry that other people will cherish and proudly wear.
There’s nothing quite like designing new jewelry and finding customers who would go – wow, this is beautiful. The fulfillment of creating beauty and making a living from your newfound hobby or natural talent is incomparable.
Did you also know that hobbies like crafting jewelry positively affect the body and mind? There is so much to gain from learning how to craft and working with the right jewelry-making tools and supplies, like jewelry-making pendants.
How Important is Jewelry Design?
There are more than a handful of additional considerations in creating fabulous jewelry than simply selecting the appropriate beads and materials and deciding on the best ways to combine them.
Other factors, such as the price of your jewelry and how comfortable it is to wear, can significantly impact how successful a design is in practice. This is true regardless of whether you create jewelry to sell, give as gifts to friends and family, or personal use.
When designing a piece of jewelry, it is critical to consider who will wear it once completed. Consider the following factors:
- Do they have a favorite or a least favorite color?
- What, if any, preferences do they have for or against particular materials? For instance, a vegetarian may not feel comfortable wearing beads made of animal bone or horn, and vegans may avoid wearing leather or suede.
- What type of lifestyle does the individual lead? For example, if they live an active lifestyle, work in a dynamic environment, or work with small children, they may not have many opportunities to wear large, delicate, or long jewelry pieces.
- If you are planning to make earrings, do your target customers typically have pierced ears or not?
- What’s your take on allergies and hypersensitivities? Certain metals can cause allergic reactions or sensitivities in some people, and the nickel in some findings can also cause problems. (Xinar’s sterling silver charms are hypoallergenic, nickel-free, and lead-free, but we can’t say the same for other shops, of course).
- What are their individual preferences? Some people prefer bright, chunky jewelry, while others prefer something small and understated.
Several factors also affect the quality of the finished product, including which techniques will be used, and have you attempted them previously? In addition, if you must learn a new approach to complete the design, this will increase the time needed to complete the procedure.
Additionally, you may make errors, which will increase the cost of materials and your time if you are making something to sell. Note that if you have never attempted a particular technique or material combination, you will have no way of knowing how the method or materials will perform in the finished piece. Making new jewelry also means taking some risks if you want to innovate.
Are the tools you require already in your possession, or do you need to purchase or borrow them?
If a new tool is required, this will increase the design cost. If you borrow tools, they may not be available when you need them. If there is no suitable shop nearby, ordering online will prevent you from beginning the project immediately.
How much will it cost to create the jewelry design?
The cost of creating a design may influence whether you can create it at all. If the finished piece is to be sold, the cost of production will have a significant impact on the price at which it must be sold. Depending on your customer base and market, extremely high-priced items may be more challenging to deal with. If you’re making the jewelry as a gift or for yourself, you should still factor in the costs.
Utilizing alternative materials or combining expensive materials with less expensive ones can help reduce overall costs.
How easy is it to obtain the materials for jewelry design?
Materials that are difficult to obtain may be more expensive and take longer to locate.
Certain age groups may require special consideration when designing jewelry; for example, young children and the elderly prefer an elastic bracelet or bangle to avoid fiddly fasteners. In addition, you may wish to skip more expensive materials such as semi-precious or precious stones in children’s everyday jewelry due to the increased likelihood of it being lost or broken.
A person who is physically challenged may have some difficulty using their hands. These people will likely prefer chunkier, solid jewelry with easy-to-grasp clasps.
Magnetic clasps are advantageous for anyone who has a problem fastening jewelry or is at risk of getting it caught on other objects.
Note, however, that magnetic clasps are easily undone if caught or pulled on. Memory wire and elastic are excellent claspless jewelry materials that can create bracelets, necklaces, anklets, and even rings.
Certain materials, such as nickel, which is occasionally found in metal findings and beads, may cause allergic reactions in some people. There are several strategies for resolving this issue, including the following: When using metals, choose sterling silver, gold, stainless steel, gold-filled, titanium, or hypoallergenic beads and findings.
While the safety of any piece of jewelry you create should always be considered, there are times when additional precautions must be taken.
More precautions are a good idea when you’re crafting jewelry for children.
Beads can be a choking hazard for small children. Therefore, particular designers enjoy incorporating a ‘breaking point’ into children’s jewelry. This is when the jewelry would break if it became entangled in something or was pulled too hard and intended to prevent injury. This can be accomplished by attaching it via jump rings rather than crimping the clasp onto the stringing material or cord. These rings would stretch and open much more quickly than nylon or other types of cord would.
Durable cords such as waxed cotton, nylon, or tiger tail can be used to ensure that any tiny beads do not harm the child in the event of a break. Magnetic clasps are another excellent option because they are strong enough to secure the jewelry but separate under excessive pressure.
Additional Advice for Beginning Crafters
1. Drop earrings, long necklaces, and delicate jewelry are probably best reserved for special occasions rather than everyday wear, as they can be impractical in various lifestyles and environments.
2. Using expensive materials or intricate techniques does not guarantee a beautiful and practical piece of jewelry if the design is inappropriate for the materials or poorly planned.
3. You can accommodate a broader range of wearer sizes and avoid fiddly clasps by using elastic or memory wire. This is particularly advantageous when creating jewelry for sale or as a surprise gift.
4. Certain stringing materials are better suited to specific applications. Certain types of beads may require a particular cord; for example, large, holed beads are better suited to being strung on thicker cords such as leather, hemp, waxed cotton, or even ribbon than nylon.
5. The finished piece’s style may influence the beads, findings, and other materials that you choose to use. For example, large beads, dark colors, and leather cords are frequently considered more appropriate for men’s jewelry than children’s, while ribbons and light beads can work well in more feminine designs.
6. If your design will expose the stringing material, select something with a nice finish incorporated into the finished design.
Evaluating Jewelry Design Ideas
Once you’ve identified your inspiration, you’ll need to figure out how to turn it into jewelry. At this point, evaluate each concept you have to see which ones will work, which you can save for future projects, and which ones have no chance.
Creating New Jewelry Concepts
Save a thought for later: If a concept doesn’t seem to be taking off, don’t get too attached to it. You can always return to old concepts and sketches later. If it’s a good idea, you might be able to work your way through it while thinking about or to work on something else.
Backtracking
In the design phase, don’t be scared to go backward. For example, you might be cutting up some paper to construct a pattern and discover that no matter how much you move the pieces around, it still doesn’t work. Start again! Cut the paper and see where it takes you.
Always Design Appropriately
It’s easy to imagine that natural, “found” artifacts can be replicated in metal because they’re so lovely. Occasionally, this is not possible. Delicate metal items can appear hefty and unclear; attempt to visualize your concept realistically.
Let Your Spirit Free When Drawing
Make your early sketches as large and loose as you wish. Nothing needs to be super exact at this point. Then, as you develop an actual design from your ideas, you can refine them all. When you’re first designing, don’t worry about the size or scale of an object. You can always use a copy machine or scan your ideas into the computer to make them larger or smaller.
You should now be able to develop ideas for new projects based on the sources of inspiration you’ve acquired. Make a collection of pieces based on an emergent topic at this point.
Find a good location, such as a large tabletop, to gather materials and develop your ideas on paper.
Mix natural materials, bits of paper and card, drawing paper, pencils, crayons, paints, printouts, photographs, books, postcards, and sketches into your collection. You might also have an opinion on whether or not you want to use any beads, stones, or other materials in the finished item, so keep that in mind.
Be as daring as you want to encourage a free flow of ideas. The most critical factor is how the piece will be put together. This implies that you must have a clear idea of how you want it to appear and feel when completed.
Consider this: how will it hang? What will the weight be? Where would the fittings go to achieve the proper balance? How will it be secured? All of these must be factored into your design.
Jewelry Design and Construction Sequence
Along with the construction methods, you must consider the sequence in which they will occur. Apart from the final polish, placing the stone into a piece of jewelry is always the last thing. Everything else should be in place already. Because few stones can endure heat from soldering or immersion in a pickle, this is the case.
Play Around with Your Jewelry Sketches
Draw away
Experiment with many concepts. You’ll start to see how the jewelry will come together. If it’s appropriate for the finished item, color it.
Consider three dimensions
Develop a sense of shape and form through thinking in three dimensions. If it helps, make a model out of thicker card material.
Create conceptual sketches
The complicated three-dimensional forms of flower petals and stamens emerge into more finalized ideas for a piece of jewelry after a series of sketches on a topic.
Idea translation efforts
When you develop your early thoughts into a practical design, you make all of the essential decisions concerning a piece of jewelry. Materials, dimensions, colors, flexibility, wearability, weight, cost, and construction are all considered. There may be constraints to how you design a piece when you first begin jewelry creation.
Some Methods of Construction
Smooth and flat: The item can be sawed from a flat sheet, and the thickness will be consistent throughout. Any decorative patterns can also be cut with the saw.
Curved sheet metal can be annealed (softened) before being curved or shaped with stakes and metal or wooden blocks.
Three-dimensional and loving it: Any casting technique or thicker sheet metal and wire can be used if some portions of the work are thicker than others.
Surface with patterns: Using a rolling mill, hammers, or punches, a patterned surface can be put to sheet metal before being cut out or molded.
Surface decoration: Before or after shaping, wires or tiny pieces of metal can be put into sheet metal.
Findings and fixtures: Ear posts or clips, pin fittings, chain fastenings, jump rings, toggles, and other fittings and finds are examples. The last elements to be added to any other building are usually these elements.
Creating Precise Scale Drawings
Make a detailed drawing from your sketch to indicate the actual dimensions of the work, where a stone will be set, and other details like surface embellishment.
1. Trace over the most definite outline of a crude sketch to refine it. Aim for solid and crisp lines. Next, transfer the traced outline to a sheet of drawing paper and color it to show the type of metal and any stones or other ornaments (using your choice media).
2. Make comprehensive sketches of the back, sides, and front of the object and the front. This will significantly help in determining the optimum construction strategy for the piece. Images should be drawn to scale or be actual size.
Ring-making
Making a ring working drawing The design frequently dictates the construction approach. For example, there could be multiple components, each built differently—a plan which tasks must be completed first and how they will be connected.
1. A ring design can be made up of several pieces.
2. Make scale drawings from above and from the side.
3. Make a drawing from above to demonstrate where elements like wires and bezels should go.
Ordering Metals for the First Time
Metals are available in various sizes and forms: sheets, tubes, rods, casting grains, and wire. Metals are often provided by a metal dealer, who will require specific dimensions of the material you’re ordering.
Although most dealers will send brochures, it is beneficial to visit a store to examine all possibilities available.
Sheet metal usually is available in any size required. However, when purchasing cheaper metals, for example, you may only be able to purchase a sheet of a specific size.
Before placing an order, you need to know the sheet metal’s width, length, and thickness you require. When purchasing metals, you will be charged for the weight measured in troy ounces or grams. Therefore, metal prices change with time.
Precious metals, in particular, are sensitive to global market price fluctuations. This frequently has a cascading effect on the price of non-precious metals.
Sheet Metal Characteristics
8-gauge
It’s a little difficult to bend and cut out. Not for the faint of heart.
10-gauge
You can use any coarse saw blade for 10-gauge sheets.
12-gauge
For a big piece, this is a good size. To cut, use a coarse saw blade.
13-gauge
Like 12-gauge, but a touch more bendable.
14-gauge
Ring shanks are suitable. A saw blade of size 00 will suffice.
16-gauge
Suitable for most jewelry-making jobs. A saw blade of size 00 will suffice.
18-gauge
Hammering, shaping, and ring shanks are all done quickly with this sheet metal gauge.
20-gauge
20-gauge is the preferred size for bezels and dapping
24-gauge
Quite useful for little projects. 24-gauge is genuinely perfect for bezels.
Ordering Metal Wires?
Oval wires
Refer to the cross-section’s height and width and the appropriate wire length.
Half-round wires
Refer to the cross-section’s height and width and the appropriate wire length.
Rectangular wires
Refer to the cross-section’s height and length and the appropriate wire length.
Round wires
Refer to the cross-section diameter and the needed wire length.
Square wires
Refer to the length of the cross-section’s sides and the needed wire length.
Techniques For Testing Jewelry Design
Before starting a precious metal creation, try it out in a different medium to see how it turns out. Going right into metalwork might be costly and time-consuming. Instead, make your “mockup” exactly how you want the final product to look. As the mockup is created, any difficulties or unexpected techniques will be revealed.
Making A Model or Mockup
Mockups can be produced with inexpensive metals like copper, copper shim, nickel, silver, or lead, as well as paper, thick card, or modeling clay (see box, right). Make an effort to select materials that will react similarly to the metal you wish to employ. To replicate the sheet metal of finished work, strips of paper and then copper shim is utilized in this example.
Lead is a soft metal. Therefore, it can be easily worked, making it ideal for mockups. On the other hand, a leader should not be utilized near precious metals because of their low melting point. When tiny particles of lead are left on precious metal while heated, they melt and leave holes in the better metal.
1. Cut a few 12 in (300 mm) long and 12–1 in (12–25 mm) wide paper strips. One side of each strip should be colored or marked differently than the other.
2. Make a paper bracelet by twisting the strips and gluing or stapling the ends together. Play around with different ideas until you discover one you like.
3. Choose your favorite paper mockup and cut a strip of copper shim to the exact measurements. Then, bend it up similarly to the paper model.
4. You’ll see that the metal reacts differently than the paper. To get the desired effect, manipulate it with your hands. Use a wooden mallet or a metal hammer if necessary. Remember that whatever happens in the mockup will happen in the actual project.
Jig Construction
A jig is a tool used to mold metal in a consistent and repeatable manner. A jig is worthwhile if your design necessitates three or more identically shaped and sized pieces. Mocking up the jig may also be important because it may not be perfect the first time.
1. A figure-eight chain requires a lot of identical links. You could use a pair of pliers to create each link separately (right), but a jig will make the process much easier.
2. Trace the shape of the required connection on tracing paper. Tape the tracing on a block of wood with masking tape.
3. Find three galvanized nails roughly the same width as the intervals between the links and two that are somewhat narrower.
With a hacksaw, cut off the tops. To remove sharp burrs and the tops with 220-grit sandpaper.
4. Hammer the thicker nails into the three locations on the trace inside the link. Then, inside the shape of the link, hammer two smaller nails on either side of the primary nail.
5. Hold one end of a length of wire you intend to use for the links with a pair of pliers. Begin winding the free end of the wire in a double-ended figure eight around the nails, as illustrated.
Annealing may be necessary to make it more flexible around the jig.
6. Continue winding until you have approximately six complete revolutions. Lift the wire from the jig and cut six separate links with a saw through the sides. The jig is suitable for repeating the operation if you evaluate the curve and size to be correct. If any adjustments are required, remove the nails and replace them with different sizes until the desired link size and form are achieved.